No More Gritty Hummus: Get Smooth & Fluffy With These Tips
Imagine diving into a bowl of hummus so lusciously creamy, so light and fluffy, it practically melts in your mouth. It’s beautifully smooth, swirled to perfection, and brimming with bright, tangy lemon, mellow garlic, and a rich, nutty depth from tahini. This isn't just a dream; it's the standard for the best hummus recipe you can make right in your own kitchen. If you've ever been disappointed by dense, gritty, or bland store-bought versions – or even homemade attempts that fell short – prepare to turn a new leaf. We're about to unlock the secrets to truly transcendent hummus, elevating your dipping game to an art form.
The journey to perfect hummus often begins with good intentions but can quickly devolve into frustration. Many home cooks, myself included, have started with what seemed like a solid recipe, only to end up with a batch that was a far cry from the silky-smooth ideal. Perhaps it was too thick, the chickpeas stubbornly refused to blend, or the flavors felt out of balance. This common disappointment has driven a global quest for the ultimate technique, leading to revelations from renowned chefs and dedicated home cooks alike. The good news? The "secret" isn't complicated, and it's surprisingly achievable, even on a busy weeknight.
The Quest for Perfection: What Makes the Best Hummus Truly Stand Out?
Before we dive into the 'how,' let's firmly establish the 'what.' What defines the best hummus, the kind that beckons you to scoop up just one more generous portion? It's a symphony of texture and flavor that goes far beyond a simple chickpea purée:
- Unrivaled Smoothness: The absolute hallmark is a velvety, uniform texture, free from any discernible chunks or graininess. It should glide across your palate.
- Lightness and Fluffiness: Unlike heavy, pasty versions, truly great hummus feels almost aerated, airy, and light, even as it maintains its rich creaminess.
- Perfect Balance of Flavor: A delicate dance between the earthy nuttiness of tahini, the vibrant acidity of fresh lemon juice, and the subtle warmth of garlic. No single flavor should overpower the others.
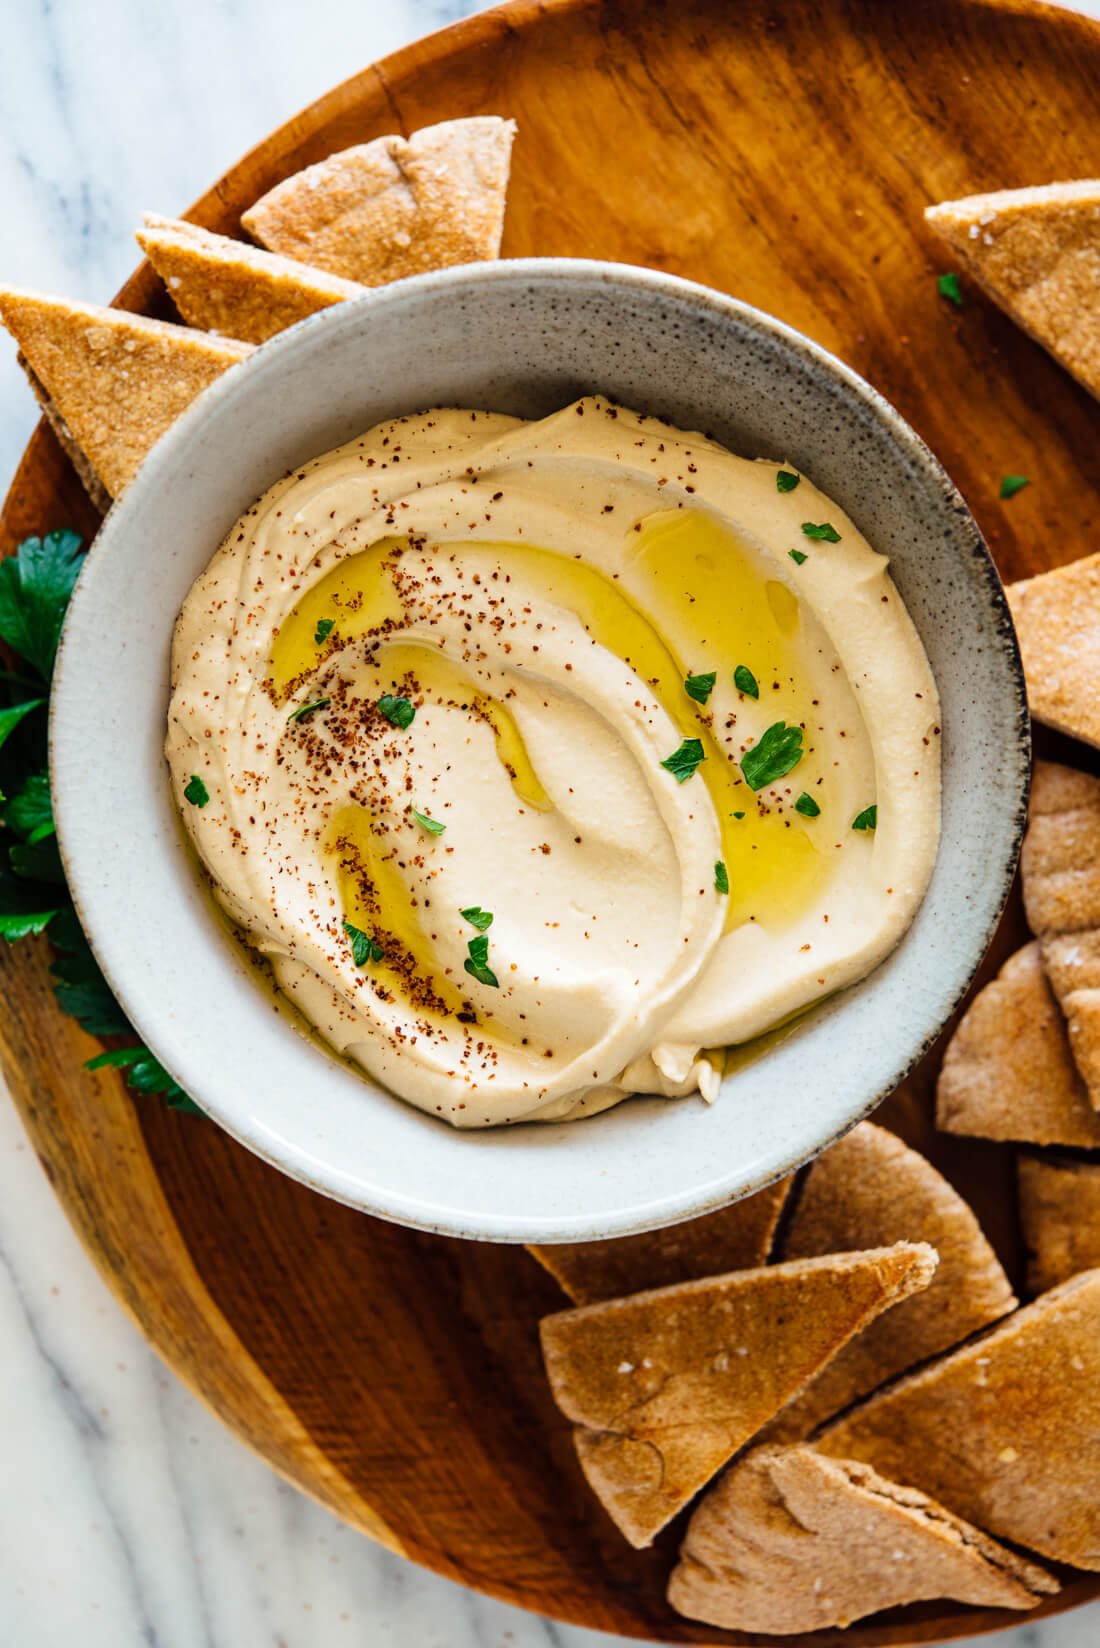
- A Beautiful Swirl: A sign of expert blending and the right consistency, making it visually appealing and ready for that final drizzle of olive oil.
Many initial attempts at making homemade hummus fall short of this ideal, often resulting in a product that's dense, a little gritty, and sometimes harshly garlicky. This can be incredibly disheartening, especially when you're aiming for something that rivals the sublime renditions found in authentic Middle Eastern eateries. The good news is that these common pitfalls are entirely avoidable with a few clever techniques borrowed from culinary masters.
Beyond the Basics: Decoding Hummus Excellence with Chickpeas
At the heart of any great hummus lies the humble chickpea. And while many recipes might simply tell you to drain a can and blend, this overlooks the single most crucial factor for achieving that coveted smooth and fluffy texture: the chickpeas themselves. Renowned chefs, notably Israeli chef Michael Solomonov (whose hummus was even named Bon Appetit's 2015 Dish of the Year), have championed a particular approach: cooking chickpeas until they are incredibly, almost impossibly, soft – to the point of being mushy.
Why mushy? Standard canned chickpeas, while convenient, are often cooked just enough to be edible, but not quite enough to dissolve into creamy oblivion when blended. Undercooked chickpeas, even slightly, retain their structure and will stubbornly refuse to break down completely, no matter how long you run your food processor. This leads directly to that dreaded gritty texture. By overcooking them until they are falling apart, you ensure they have no resistance left to offer, allowing them to transform into a dreamily smooth paste.
Solomonov's secret weapon, beyond just prolonged cooking, is the addition of baking soda during the boiling process. Baking soda, an alkaline substance, helps to break down the pectin in the chickpea skins, making them incredibly tender and ensuring they practically melt away. This ingenious trick means you can skip the tedious and time-consuming step of peeling individual chickpea skins – a task few home cooks have the patience for!
The effect is dramatic: chickpeas treated with baking soda don't just become softer; their skins essentially disintegrate, eliminating the primary source of grittiness in many homemade hummus recipes. It's a game-changer for anyone seeking that professional-level smoothness.
Your Secret Weapon: The Baking Soda Chickpea Method
While Solomonov cooks his chickpeas from scratch overnight, a brilliant time-saving hack has emerged for home cooks: applying the baking soda method to canned or pre-cooked chickpeas. This simple step adds mere minutes to your preparation time but delivers monumental results, transforming ordinary chickpeas into hummus-ready marvels. This truly is the foundation of the Homemade Hummus in 20 Mins: Mushy Chickpeas & Baking Soda technique.
How to Prepare Your Super-Soft Chickpeas:
- Drain and Rinse: Start by draining and rinsing a can of chickpeas thoroughly under cool water.
- Boil with Baking Soda: Transfer the rinsed chickpeas to a medium saucepan. Add about 1/2 teaspoon of baking soda per 15-ounce can of chickpeas, then cover with fresh water by about an inch.
- Simmer to Mushy Perfection: Bring the mixture to a boil, then reduce the heat and simmer gently for about 15-20 minutes. You'll know they're ready when they are incredibly soft to the touch, easily smushed between your fingers, and many of the skins have visibly split or are floating freely. Don't worry if they look a little unappetizingly mushy at this stage – that's exactly what we want!
- Rinse Again (Crucial Step): Immediately drain the chickpeas through a fine-mesh sieve and rinse them thoroughly under cool running water for a minute or two. This step is vital for two reasons:
- It washes away any residual baking soda flavor, ensuring your hummus tastes pure and clean.
- It cools the chickpeas down. Blending hot chickpeas can lead to a less stable emulsion and can potentially cause your hummus to develop a strange outer film as it cools. Cool chickpeas lead to a brighter, more stable end product.
Once rinsed and cooled, your chickpeas are primed and ready to be transformed into the smoothest, fluffiest hummus you’ve ever tasted. This single, simple step makes all the difference, effectively fast-tracking you to culinary success without the need for an overnight soak or endless chickpea peeling.
The Pillars of Flavor: Tahini, Lemon, and Garlic
While mushy chickpeas provide the canvas, the remaining ingredients are the vibrant colors that bring your hummus masterpiece to life. The quality and balance of tahini, lemon juice, and garlic are paramount for that authentic, irresistible Middle Eastern flavor profile.
- Great Tahini: The Soul of Hummus
Not all tahini is created equal. Tahini, a paste made from ground sesame seeds, is responsible for hummus’s distinctive nutty flavor and creamy richness. Seek out high-quality tahini, ideally from the Middle East (brands like Soom, Al Wadi, or Seed + Mill are often recommended). Good tahini will be pourable and light in color, with a smooth, slightly bitter, yet rich taste. Avoid tahini that is thick, pasty, or overly bitter. A generous amount of quality tahini is non-negotiable for achieving that deep, complex flavor and luxurious texture. - Fresh Lemon Juice: The Bright Spark
Lemon juice provides the essential tang and acidity that brightens up the entire dish, cutting through the richness of the tahini and chickpeas. Always use freshly squeezed lemon juice – bottled varieties simply don't offer the same vibrant, zesty punch. You’ll want to taste and adjust the lemon, as different lemons vary in acidity and your personal preference for tanginess might differ. - Mellow Garlic: The Aromatic Foundation
Garlic adds a foundational aromatic note. The key here is "mellow." Too much raw garlic can make your hummus harsh and overpowering. Some recipes call for roasted garlic for a sweeter, more subtle flavor, but raw garlic, when used judiciously, offers a delightful pungency. Start with one small clove, crushed, and add more to taste. A good trick is to mince your garlic very finely and let it sit for a few minutes before adding to mellow its intensity slightly. - Ice Water: The Secret to Fluffiness
This might sound unusual, but cold water (or even a few ice cubes) added during blending is a game-changer. As you blend, the friction creates heat. Ice water helps keep the mixture cool, prevents the tahini from seizing, and emulsifies beautifully, resulting in an incredibly light, fluffy, and almost whipped texture. - Extra Virgin Olive Oil: The Finishing Touch
While not blended into the hummus itself, a generous drizzle of good quality extra virgin olive oil before serving is crucial. It adds a final layer of richness, a beautiful sheen, and a peppery or fruity note that perfectly complements the hummus.
Assembling Your Masterpiece: Blending Techniques and Beyond
With your perfectly prepared chickpeas and high-quality ingredients at the ready, the final stage is all about blending them into a harmonious whole. This is where your food processor or high-speed blender comes in:
- Start with Tahini and Lemon: In your food processor, combine the tahini, lemon juice, and a crushed garlic clove. Process this mixture first for about a minute until it lightens in color and becomes slightly fluffy. This step helps to emulsify the tahini and creates a stable base.
- Add Chickpeas: Add your cooled, mushy chickpeas to the tahini mixture. Process continuously, scraping down the sides as needed.
- Introduce Ice Water Gradually: While the processor is running, slowly stream in ice-cold water (or drop in a few ice cubes, one at a time). This is where the magic happens, transforming the thick paste into a wonderfully light and airy consistency. Continue blending until the hummus is incredibly smooth, fluffy, and reaches your desired consistency, which might take a good 3-5 minutes. Don't be shy about blending for longer than you think necessary.
- Season and Taste: Add salt to taste. Hummus often needs more salt than you might initially think. Continue blending briefly to incorporate.
- Serve with Style: Scoop your freshly made hummus into a shallow bowl. Create a beautiful swirl on top with the back of a spoon. Drizzle generously with good quality extra virgin olive oil, and garnish with a sprinkle of paprika, sumac, chopped fresh parsley, or a few pine nuts.
The secret to ultra-creamy hummus: better than store-bought isn't a single element, but rather the synergistic combination of these steps. Serve it traditionally with warm pita bread, crunchy fresh vegetables like cucumber and carrots, or as a spread in wraps and sandwiches. Homemade hummus is best enjoyed fresh, but it will keep well in an airtight container in the refrigerator for up to 5 days.
Conclusion
The quest for the ultimate hummus ends here. By understanding the critical role of mushy, baking soda-treated chickpeas, investing in quality tahini, and mastering the blending technique with ice water, you can consistently achieve a hummus that is dramatically smoother, lighter, and more flavorful than any store-bought variety. Say goodbye to gritty textures and bland flavors, and embrace the joy of truly homemade, restaurant-quality hummus. Armed with these tips, your kitchen is now the gateway to a world of creamy, fluffy perfection, proving that the best hummus recipe is indeed the one you make yourself.
